 GERMANY
 ENGLISH
 FRANCE
 SPAIN
SPAIN PORTUGAL


Blog
ADJUSTING A MITER SAW
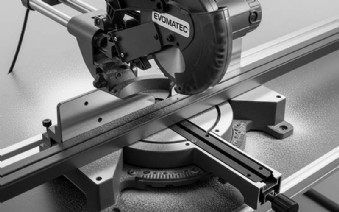
Adjusting the Miter Saw: The Ultimate Step-by-Step Guide to Perfection
Every owner of a miter saw knows that moment of frustration: you invest in a good machine, cut two pieces at exactly 45 degrees, and when you join them, an ugly gap appears in the corner. You re-measure, try again, but the result remains unsatisfactory. The cause is rarely a defect in the saw, but almost always poor calibration. Miter saws are pre-set at the factory, but through transport and regular use, the crucial angles can shift by a few, but critical, tenths of a degree. The good news is: with the right knowledge and a little patience, anyone can perfectly adjust their miter saw and achieve a level of precision that meets professional standards.
This guide is your ultimate step-by-step manual for calibrating your miter saw. We will cover every important aspect of the adjustment, from the basic 90-degree cut to the fine-tuning of the miter and bevel stops. We will explain what tools you need and which test methods provide truly reliable results. Take the time to carry out this process carefully. An hour invested in the perfect adjustment of your miter saw will save you countless hours of frustration, wasted material, and rework.
Preparation: The Right Tools for Precision
To adjust for precision, you need precise measuring tools. Never rely solely on the built-in scale of your saw. Before you begin, gather the necessary tools. You will need a high-quality combination square or a carpenter's square whose right angle you have previously verified. A digital angle gauge is a huge help, but not essential. Also, have the adjustment wrenches that came with the saw ready. A good light source like a flashlight helps to detect the smallest gaps. And most importantly: for all adjustment work, the saw must be disconnected from the power supply. Unplug it!
Step 1: The 90-Degree Cross-Cut – The Most Important Adjustment
The exact perpendicularity of the saw blade to the rear fence is the absolute foundation for all other adjustments. If this angle is not correct, all other cuts will also be flawed.
Start with the check. Set the saw's turntable to exactly the 0-degree position and let it lock into place. Lower the saw head completely. Now, place your square with the long leg firmly against the fence and carefully bring the short leg up to the saw blade. Be sure to place the square against the body of the blade and not the carbide teeth, as they can be slightly offset. Shine a light from the back. If you see a light gap between the saw blade and the square, the setting is incorrect.
Now, perform the correction. Most miter saws allow for an adjustment of the fence. Loosen the screws that fasten the fence to the saw table just enough so that it can be moved with light taps. Now, align the fence perfectly perpendicular to the saw blade using the square. Tighten the screws again and re-check the result, as the fence can shift slightly when tightened. Repeat this process until no light gap is visible.
Step 2: The 90-Degree Bevel Angle – Perfectly Vertical Cuts
This adjustment ensures that the saw blade is exactly perpendicular to the saw table. An error here will result in your cut edges not being square.
The check is simple. Set the saw's bevel angle to 0 degrees. Place your square with the base flat on the saw table and place the leg against the body of the saw blade. Here, too, a light source helps to detect a gap. Perform this check at several points on the blade to rule out any possible warping of the blade itself.
The correction is made via the stop screw for the 0-degree bevel. Look for a small set screw with a lock nut on the saw head's pivot mechanism. Loosen the nut and turn the screw in or out until the blade is perfectly perpendicular to the table. Check the result and then retighten the lock nut.
Step 3: The 45-Degree Miter Stops – For Perfect Corners
Relying on the 45-degree mark on the scale is often inaccurate. For perfect frames, these end stops must be calibrated exactly.
A test cut is best for checking. Take a wide, straight piece of scrap wood or a profile. Set your saw to the left 45-degree stop and make a cut. Turn the workpiece over and make a second cut from the same end. Place the two freshly cut edges together. If the 45-degree angle is perfect, the two outer edges of the wood should form a perfectly straight line of 180 degrees. Place a long ruler against it. Any deviation will be visible as a gap.
The correction is made via the stop screws for the 45-degree positions. Similar to the bevel adjustment, there are small set screws that limit the swivel range of the turntable. Adjust these screws in minimal increments and repeat the test cut until the result is perfect. Perform this process for the left and the right 45-degree settings.
Step 4: The 45-Degree Bevel Stops – For Clean Bevel Cuts
The bevel stops at 45 degrees must also be precise to cut, for example, clean V-grooves or complex miters.
The check is best done with a precision protractor or a digital angle gauge. Set the bevel to the 45-degree stop and measure the angle between the saw table and the saw blade.
The correction works analogously to the 0-degree bevel adjustment. Adjust the respective stop screw for the 45-degree bevel until the angle is exact. Don't forget to retighten the lock nut.
Step 5: Adjusting the Cutting Line Laser or LED Indicator
A laser or an LED shadow line indicator are fantastic aids, but only if they accurately show the cutting edge.
For checking and correction, make a shallow test cut in a piece of wood. Leave the saw blade in the kerf (machine unplugged). Turn on the laser. Now you can loosen the adjustment screws on the laser module and align the laser line exactly with the edge of the resulting kerf. Decide whether the laser should indicate the left or right edge of the cut and stick to that setting.
Regular Maintenance: Keeping Your Saw Precise in the Long Run
Calibration is not a one-time affair. After every transport of the saw, after intensive use, or after changing the saw blade, you should briefly check the most important settings. Keep your machine clean. Resin deposits and sawdust on the stops or in the mechanism can also impair precision.
Conclusion The precise adjustment of a miter saw is not rocket science, but a methodical process that any ambitious user can master. It is the bridge between a good machine and a perfect work result. By carefully calibrating and regularly checking your saw, you take full control over the precision of your work. The result is not only perfectly fitting workpieces and professional-looking projects, but also a deeper understanding and greater appreciation for your most important precision tool.